· Rumtoo Process Team · Technical Guide · 14 min read
How to Recycle 3D Printing Waste: From Failed Prints to Reusable Regrind
A practical guide to recycling PLA, PETG, and ABS 3D printing scrap using a desktop shredder. Covers material sorting, shredding workflow, regrind quality control, and cost-benefit analysis for labs, makerspaces, and pilot recycling programs.
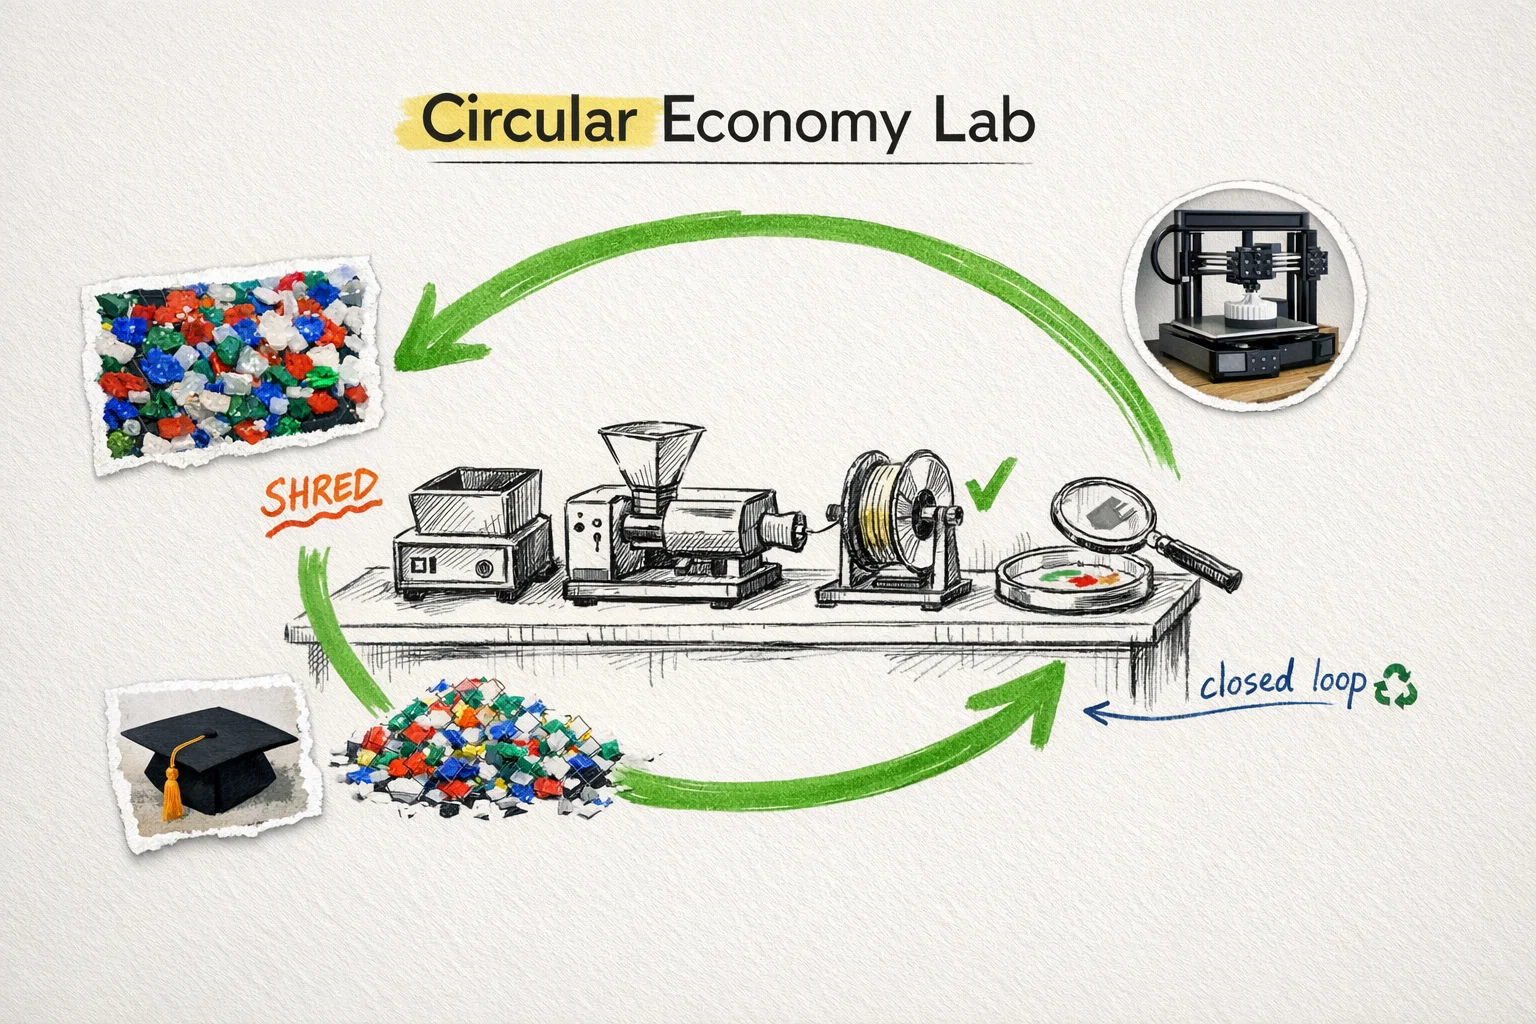
A materials science lab at a mid-sized university in Michigan was throwing away roughly 18 kg of 3D printing scrap every month. Failed prints, support structures, calibration towers, color test swatches — all of it went straight into the general waste bin. The lab coordinator knew the material was technically recyclable, but without a practical way to process it on-site, there was no alternative. The plastic went to landfill.
In early 2025, the department added a mini desktop plastic shredder to their post-processing station. Within the first semester, they were recovering over 80% of their PLA waste as clean, consistent 4–6 mm regrind. The shredded output fed directly into a small filament extruder for student material testing projects. What used to be a $5,400 annual waste stream became a hands-on teaching tool — and the lab’s filament budget dropped by roughly 35%.
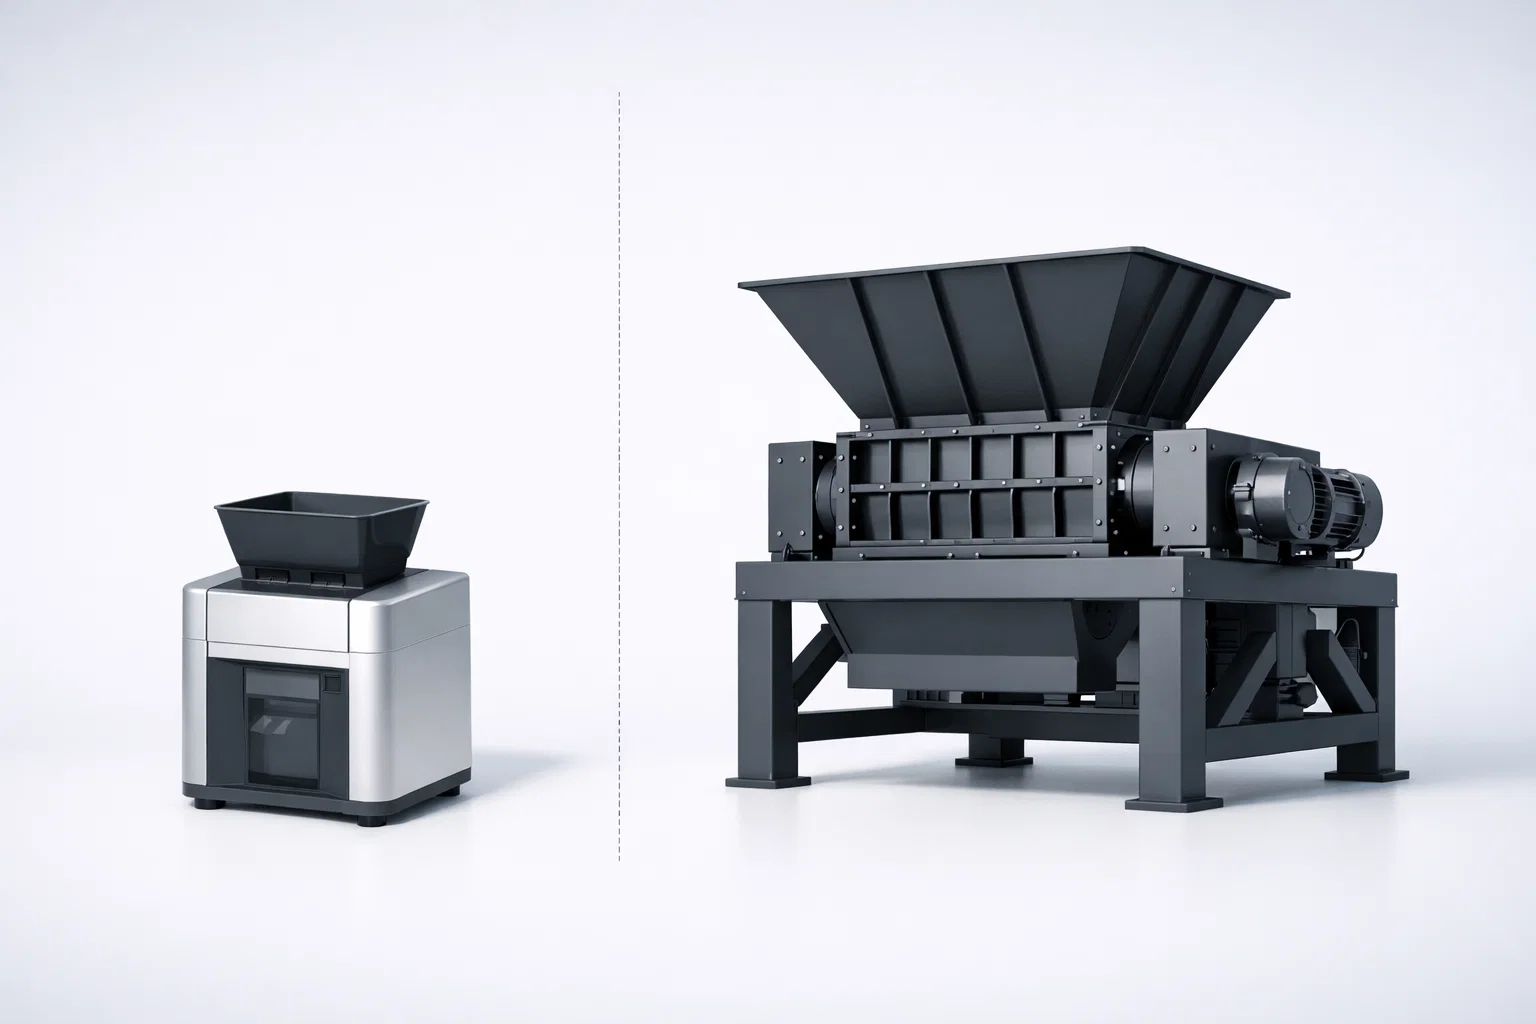
The lesson is not that recycling 3D printing waste is difficult. It isn’t. The lesson is that most labs and makerspaces simply lack a reliable, right-sized tool to do it. Industrial shredders are wildly oversized for 10–50 kg/month waste volumes. Scissors and hand cutters produce inconsistent particles that jam extruder hoppers. A purpose-built desktop shredder fills the gap.
This guide walks through the complete process: how much waste 3D printing actually generates, which materials can be recycled and which cannot, the step-by-step shredding workflow, quality control for usable regrind, and a realistic cost-benefit analysis.
The Scale of 3D Printing Waste — and Why It Matters
3D printing generates more waste than most users realize. Industry data suggests that hobbyist and educational printers experience failure rates between 10% and 20% of total filament consumed, depending on printer calibration, material type, and part complexity. Support structures add another 5–15% of material that is discarded after every build. Even successful prints produce waste: brim lines, skirts, purge towers, and test prints all go in the bin.
For a single desktop printer running 1–2 kg of filament per week, that translates to roughly 1–3 kg of scrap per month. Multiply that across a university lab with 8–12 printers, a commercial prototyping shop with 20+ machines, or a print farm running 50+ units, and monthly waste volumes reach 15–80 kg easily.
There is a common misconception that PLA is biodegradable and therefore does not need recycling. PLA is industrially compostable under specific conditions — sustained temperatures above 58 °C, controlled humidity, and active microbial communities — conditions that do not exist in a standard landfill. In practice, PLA persists in landfill environments for decades, behaving much like conventional plastic. Recycling PLA mechanically through shredding and re-extrusion is a far more effective end-of-life pathway than hoping it will decompose.
Material Sorting: The First and Most Important Step
Not all 3D printing materials behave the same way in a shredder or extruder. Mixing different polymers produces regrind that is unusable for any quality-sensitive application. Sorting by material type is non-negotiable.
Materials That Recycle Well
PLA (Polylactic Acid) — the easiest material to recycle on a desktop shredder. PLA is relatively brittle, which means it fractures cleanly during shredding rather than deforming or stringing. Shredding produces uniform particles with minimal dust. PLA is the ideal starting material for anyone setting up a recycling workflow for the first time.
PETG (Polyethylene Terephthalate Glycol) — recyclable, but more sensitive to moisture than PLA. PETG absorbs atmospheric moisture readily, and wet PETG regrind will produce bubbles and inconsistent diameter during re-extrusion. Best practice: shred PETG promptly and store regrind in sealed containers with desiccant until use. Dry at 65 °C for 4–6 hours before feeding into an extruder.
ABS (Acrylonitrile Butadiene Styrene) — recyclable with one important caveat: ABS releases trace amounts of styrene vapor when shredded aggressively. The amount is small and well below occupational exposure limits in a ventilated room, but the odor is noticeable. Process ABS in a well-ventilated area or near an exhaust point.
HDPE and PP (bottle caps, rigid containers) — not typical 3D printing materials, but many labs and makerspaces collect bottle caps as a secondary feedstock for injection molding projects. A desktop shredder handles these easily, though the output particle shape is less uniform than with brittle polymers like PLA.
Materials That Require Caution
Polycarbonate (PC) — very hard. A desktop shredder can process PC, but feed rate should be reduced significantly. Forcing large PC pieces through the cutting chamber at full speed risks overloading the motor. Cut PC parts into smaller pieces before feeding.
Nylon (PA) — tough and flexible, which makes it resistant to clean shearing. Nylon tends to deform rather than fracture, producing elongated particles. Pre-cooling nylon parts (freezer for 30 minutes) improves shredding consistency by making the material more brittle at lower temperatures.
Materials to Avoid
Carbon fiber or glass fiber filled filaments — the fiber content is extremely abrasive to cutting tools. Processing fiber-filled materials will dramatically accelerate blade wear. H13 tool steel blades that last 300+ hours on unfilled PLA may wear down in under 50 hours on carbon-fiber PLA. Unless you have a dedicated blade set for abrasive materials, avoid shredding fiber-filled stock on your primary blades.
TPU and other flexible filaments — soft, elastic materials wrap around rotating components rather than being cut. Most desktop shredders are not designed with anti-wrap features, and attempting to shred TPU risks jamming the cutting chamber.
Parts with metal inserts — heat-set inserts, embedded nuts, or threaded brass fittings must be removed before shredding. Metal contamination will damage blades immediately and irreversibly.
| Material | Recyclability | Shredding Difficulty | Special Requirements |
|---|---|---|---|
| PLA | Excellent | Easy | None |
| PETG | Good | Easy | Dry regrind before extrusion |
| ABS | Good | Easy | Ventilation recommended |
| HDPE / PP | Good | Easy | Irregular particle shape |
| PC | Fair | Moderate | Reduce feed rate, pre-cut |
| Nylon (PA) | Fair | Moderate | Pre-cool for cleaner cuts |
| CF/GF filled | Not recommended | Hard | Extreme blade wear |
| TPU / Flex | Not recommended | Wrapping risk | Anti-wrap rotor required |
The Desktop Shredding Workflow: Step by Step
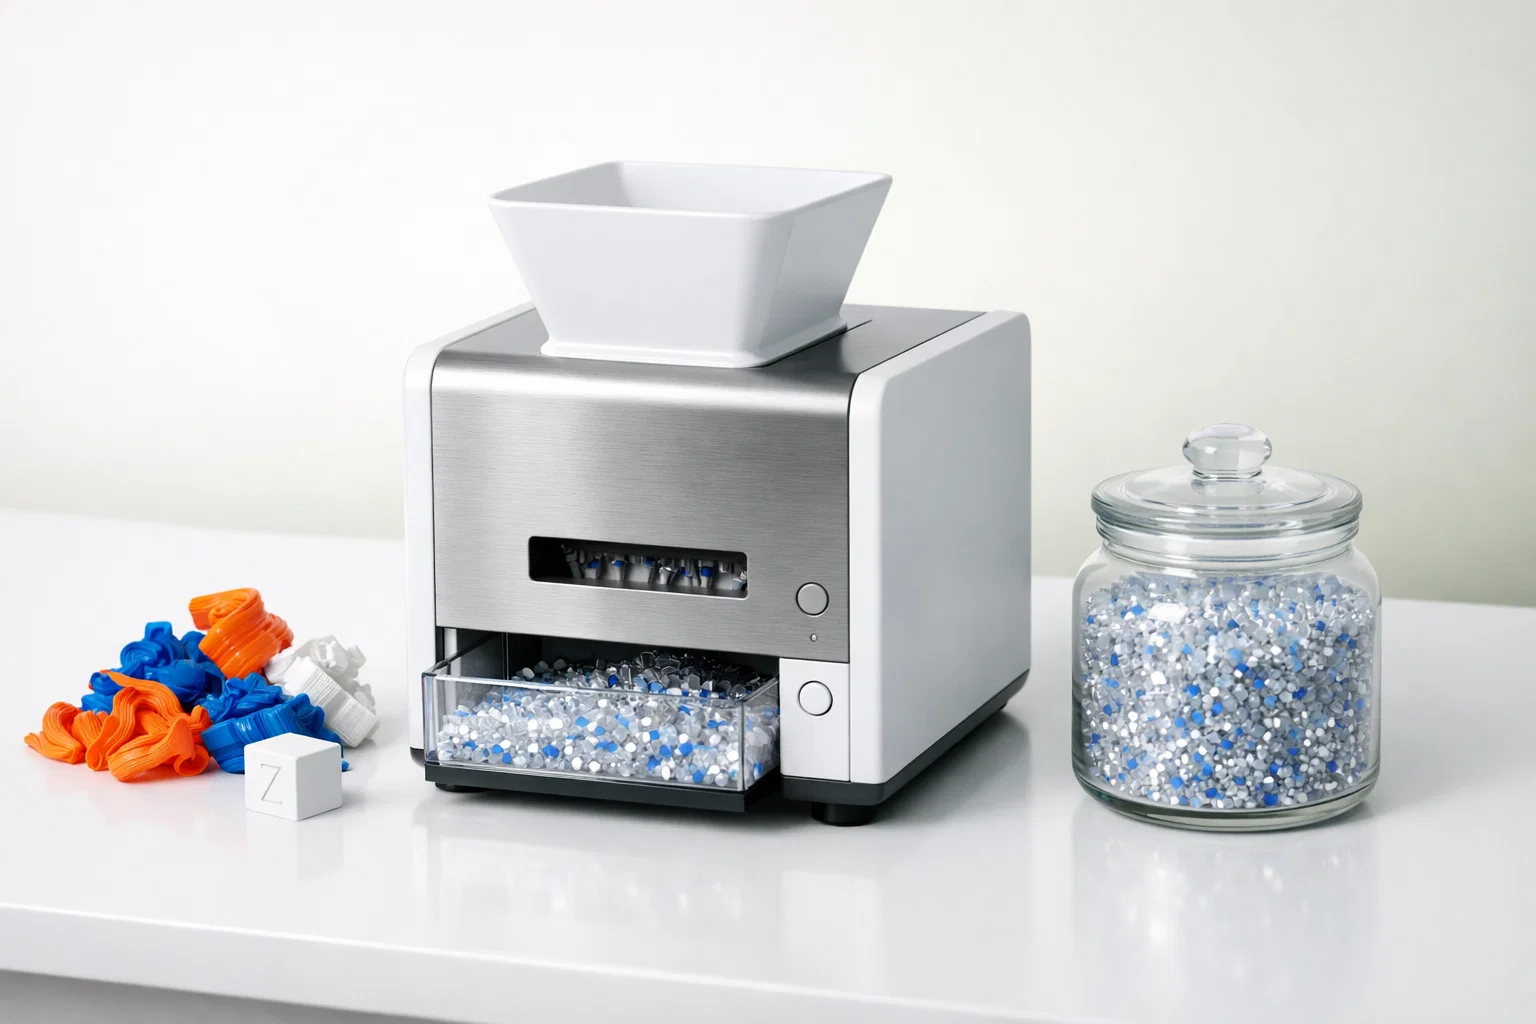
The workflow below is based on a geared desktop shredder with a 120 × 200 mm feed opening, dual knife sets, and forward/reverse motor control — the configuration used in the Rumtoo mini desktop shredder.
Step 1: Sort and Inspect
Separate scrap by polymer type and, ideally, by color. Remove any parts with metal inserts, adhesive residue, or non-plastic components. This step takes the most discipline but has the largest impact on output quality. A labeled bin system (one bin per material type) at each printer station makes sorting automatic.
Step 2: Pre-Cut Oversized Pieces
The feed opening on a typical desktop shredder accepts pieces up to approximately 120 × 200 mm. Large failed prints — tall vase-mode structures, wide flat plates, or long cylindrical parts — need to be cut down with a band saw, wire cutter, or heavy-duty scissors before feeding. The time investment is minimal (a few seconds per piece), but skipping this step causes bridging across the feed throat and forces the operator to pause and clear the jam.
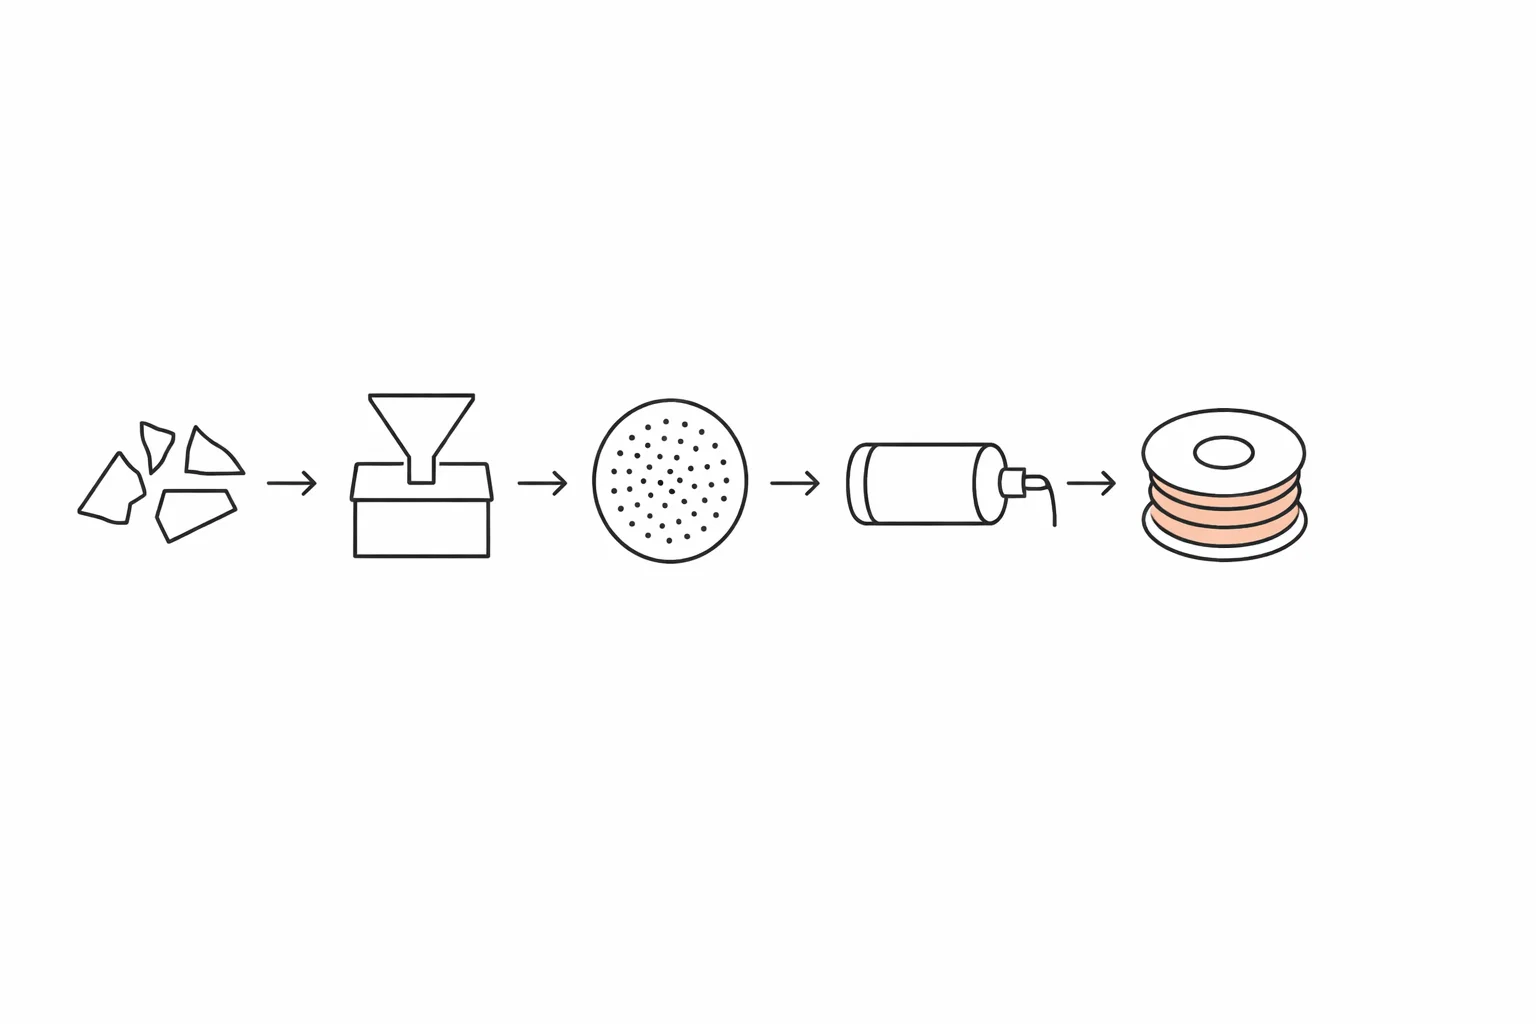
Step 3: Shred
Feed prepared pieces into the shredder at a steady pace. Avoid dumping a large batch into the hopper all at once — consistent feeding produces more uniform output. On a 1.5 kW geared desktop shredder, typical throughput is 1–5 kg/h depending on material hardness and piece size.
If a piece jams or bridges, engage reverse mode to back the rotors out, reposition the piece, and continue forward. This forward/reverse jog capability eliminates the need to open the cutting chamber for clearing — a process that costs 5–10 minutes on shredders without reverse control and can be handled in under 30 seconds with it.
Blade selection matters. The mini desktop shredder ships with two interchangeable knife sets:
- Set A (22 rotating + 22 fixed, 5 mm spacing): General-purpose cutting. Produces 4–6 mm regrind suitable for most downstream applications.
- Set B (36 rotating + 36 fixed, 3 mm spacing): Finer output for applications requiring smaller, more uniform particles — such as direct feeding into small-diameter filament extruders.
Choose the knife set based on your downstream process requirements. If you are preparing regrind for a filament extruder with a small hopper and narrow feed screw, Set B will produce better results. For general storage or later use in larger equipment, Set A is sufficient and offers higher throughput.
Step 4: Screen and Remove Fines (Optional)
For most lab and makerspace applications, the shredder output can be used as-is. However, if you need tight particle size control — for instance, if your extruder is sensitive to fines or dust — pass the regrind through a simple mesh sieve (4 mm and 8 mm stacked screens work well). Retain the 4–8 mm fraction and re-shred the oversize pieces. Discard or set aside the sub-4 mm fines, which tend to cause inconsistent feeding in small extruder hoppers.
Step 5: Dry
This step is critical for PETG and nylon, and recommended for any regrind that will be stored before use. Moisture in regrind causes steam bubbles during extrusion, producing filament with internal voids and inconsistent diameter.
| Material | Drying Temperature | Drying Time | Moisture Sensitivity |
|---|---|---|---|
| PLA | 50–55 °C | 2–4 hours | Low |
| PETG | 65 °C | 4–6 hours | High |
| ABS | 80 °C | 2–4 hours | Moderate |
| Nylon | 80–85 °C | 8–12 hours | Very high |
A basic food dehydrator or laboratory oven works adequately for small batches. For continuous processing, a dedicated pellet dryer with temperature control and airflow circulation is more consistent.
Step 6: Store or Feed Downstream
Dried regrind should be stored in airtight containers with desiccant packs. Mason jars, vacuum-sealed bags, or sealed plastic bins all work. Label each container with: material type, color, date shredded, and knife set used. This traceability becomes important when troubleshooting filament quality issues weeks or months later.
If your workflow includes a filament extruder, the regrind can feed directly into the extruder hopper. For labs without an extruder, the regrind itself is a useful product — it can be used for injection molding tests, material property analysis, or donated/sold to facilities with extrusion capability.
Quality Control: Ensuring Your Regrind Is Actually Usable
Shredding plastic is the easy part. Producing regrind that performs consistently in downstream equipment is where attention to detail pays off.
Particle size uniformity is the single most important quality metric. Regrind with a wide particle size distribution — a mix of large chunks, medium pieces, and fine dust — feeds erratically through extruder screws, causing surging, inconsistent melt pressure, and variable filament diameter. The target is a narrow size band: 3–6 mm for most desktop filament extruders, with minimal fines below 2 mm.
Contamination control means more than just removing metal. Cross-contamination between polymer types is the most common quality failure in makerspace recycling. A single PLA piece mixed into a PETG batch will create a visible defect in the extruded filament — PLA melts at a lower temperature and degrades at PETG processing temperatures. Strict sorting discipline is the only solution.
Color management is a practical consideration. Mixing colors produces a muddy brown or gray regrind. This is perfectly functional for mechanical testing or non-visual prototypes, but if you want usable colored filament, sort by color during the initial collection stage. Most labs designate one bin for “mixed color” and separate bins for white, black, and any dominant color in their print volume.
Moisture testing can be done simply by extruding a small sample and observing the filament surface. Bubbles, foaming, or a rough surface texture indicate excess moisture. If you see these signs, return the batch to the dryer for an additional cycle. For labs with access to a moisture analyzer, target <0.05% moisture content for PLA and <0.02% for PETG.
Cost-Benefit Analysis: Does Desktop Recycling Make Financial Sense?
The economics depend on your waste volume, filament cost, and whether you value the educational or R&D benefits beyond pure cost savings.
Direct Cost Savings
Consider a makerspace consuming 8 kg of PLA filament per week across 10 printers. At a conservative 15% waste rate, that produces roughly 5 kg of scrap per month. With PLA filament priced at $20–30/kg (brand-dependent), the recoverable material value is $100–150/month, or $1,200–1,800/year.
A desktop shredder combined with a basic filament extruder represents a total equipment investment that typically pays for itself within 12–18 months at this waste volume — faster for larger operations.
Operating costs are minimal. The 1.5 kW motor at typical load draws roughly 0.8–1.2 kWh of electricity per hour of operation. At $0.12/kWh, processing 5 kg of scrap (approximately 2–3 hours of shredding) costs under $0.40 in electricity. Blade replacement costs vary by material hardness but are infrequent — H13 tool steel blades typically last 300+ hours in controlled lab environments processing unfilled thermoplastics.
Indirect Value
For educational institutions, the value extends well beyond filament savings. A working recycling station integrates naturally into materials science, sustainability, and engineering design curricula. Several universities have used their recycling setups as the basis for student research projects, sustainability committee reports, and green campus certification applications. The visibility and educational value often justify the equipment investment even at waste volumes where the pure cost savings alone would not.
For R&D teams, the ability to shred and re-process experimental material in-house — rather than sending it out or discarding it — accelerates iteration cycles. A materials engineer testing a new PLA blend can shred failed test specimens, re-extrude, and retest within the same day, rather than waiting for new raw material delivery.
Break-Even Calculation
| Factor | Value |
|---|---|
| Monthly scrap volume | 5–15 kg |
| Filament cost saved (at $25/kg) | $125–375/month |
| Electricity cost | ~$1–2/month |
| Blade maintenance (amortized) | ~$5–10/month |
| Net monthly savings | $110–365/month |
| Equipment payback period | 6–18 months |
Note: Payback period assumes the regrind is re-extruded into filament that displaces new filament purchases. If regrind is used only for material testing or injection molding trials, the financial return is lower but the R&D value is typically higher.
Frequently Asked Questions
Can recycled PLA regrind be fed directly into a desktop filament extruder?
Yes, provided the particle size is within the extruder’s intake range (typically 3–6 mm) and the regrind has been properly dried. Most desktop filament extruders — including Rumtoo’s filament extrusion units — accept regrind directly in their hopper. Blending recycled regrind with 20–30% virgin pellets can improve extrusion consistency, especially for first-time recycling workflows.
What can I do with mixed-color regrind?
Mixed-color regrind produces a neutral gray or brown filament. This is perfectly suitable for functional prototypes, internal structural components, test specimens for mechanical property measurement, and educational printing projects where appearance is not a priority. Some makerspaces market mixed-color filament as “eco-filament” for sustainability-focused customers.
How much scrap can a desktop shredder process in a day?
The Rumtoo mini desktop shredder processes 1–5 kg/h depending on material type and feed preparation. In a typical lab scenario with intermittent use (1–2 hours of actual shredding per day), daily capacity is 2–10 kg — more than sufficient for operations generating up to 50 kg of scrap per month.
Is the noise level acceptable for a shared lab or classroom?
The Rumtoo desktop shredder operates below 55 dB during normal operation — comparable to a typical conversation or a quiet dishwasher cycle. This makes it suitable for shared lab environments, open-plan makerspaces, and educational settings without requiring acoustic enclosures or hearing protection. By comparison, industrial shredders typically operate at 80–105 dB and require dedicated acoustic enclosures.
How often do the blades need replacement?
Blade life depends heavily on the material being processed. On unfilled thermoplastics (PLA, PETG, ABS, PP), H13 tool steel blades typically last 300+ operating hours before requiring resharpening. Processing fiber-filled or mineral-filled materials will reduce blade life significantly — potentially to under 100 hours. Keeping a spare blade set on hand is recommended for operations that cannot tolerate any shredding downtime.
Does recycled PLA lose mechanical strength compared to virgin material?
Each thermal cycle (melting and re-solidifying) causes some degree of polymer chain degradation. For PLA, the first recycling pass typically reduces tensile strength by 5–15% and elongation at break by 10–20%. The material remains fully functional for prototyping, non-structural components, and educational use. For load-bearing applications, blending 30–50% virgin PLA with recycled regrind restores mechanical properties to near-original levels. Published studies show PLA can be mechanically recycled 3–5 times before properties degrade to a point where the material is no longer useful for filament extrusion.
What other equipment do I need besides a shredder?
The shredder is the core piece. Beyond that, the minimum useful setup includes: airtight storage containers for sorted regrind, a drying method (food dehydrator, lab oven, or dedicated pellet dryer), and a set of mesh sieves if you need tight particle size control. For a complete closed-loop system that produces printable filament, add a desktop filament extruder and a filament winding station. The total footprint for a shredder + extruder setup fits comfortably in under 2 m² of bench space.
Next Steps
If you are generating 3D printing waste and want to evaluate whether a desktop recycling setup makes sense for your lab or makerspace, start by measuring your actual monthly scrap volume by material type. That single number determines the equipment configuration, payback timeline, and whether the investment is justified on cost savings alone or needs to be valued as an educational and R&D tool.
Send your material types, estimated monthly volumes, and intended downstream use (filament extrusion, injection molding, material testing, or storage for later use) to the Rumtoo process team. We will recommend a desktop shredder configuration matched to your specific throughput and particle size requirements.
Related pages:
- 3D printing recycling
- desktop shredder
- PLA recycling
- regrind
- lab equipment